
If you want to display a small squad of models, you might have considered a display base or Diorama. I recently created a small base for my Warhammer Underworlds warband the Gorechosen of Dromm, simply because I loved the paint scheme and how the warband plays.
I’m no expert at creating dioramas and scenes, but I wanted to take you through a little bit of the thought process behind building something like this, and hopefully inspire people to get creative themselves.
Planning it out
I’m not completely new to the concept of making an Underworlds diorama, having tried failed at making one a few years back. More recently I saw the brilliant diorama by Dana Howl, which then reminded me of some other great examples by people such as The Brush Brothers and Mordrak Painting. There are even some great examples by Pale King Hobby, who we included on our list of great Underworlds painters to check out.
The first thing to start thinking about is what you want to use to make your scene. You want t avoid just a boring, flat surface.
XPS foam seems to be a popular choice among terrain makers, but I actually opted to use Cork sheet as you can cut out spaces for the models to sit in a little easier. It’s also partly because cork sheet is already something I’m used to working with.
For my diorama I grabbed a 160mm warhammer base and started planning out a loose layout.
Before even touching the glue you want to start by planning a loose layout. Try to consider your main viewing angle when doing this. You’ll want to have all fighters visible from that angle, and try to avoid things being too clumped up or spaced out. It might be helpful to include some changes in height or elevation to make sure each fighter is visible, or give certain fighters more emphasis.

You can also start to think about any major items of terrain you’d like to include, which can fill in gaps from your main viewing angle. Just be careful not to make things too busy.
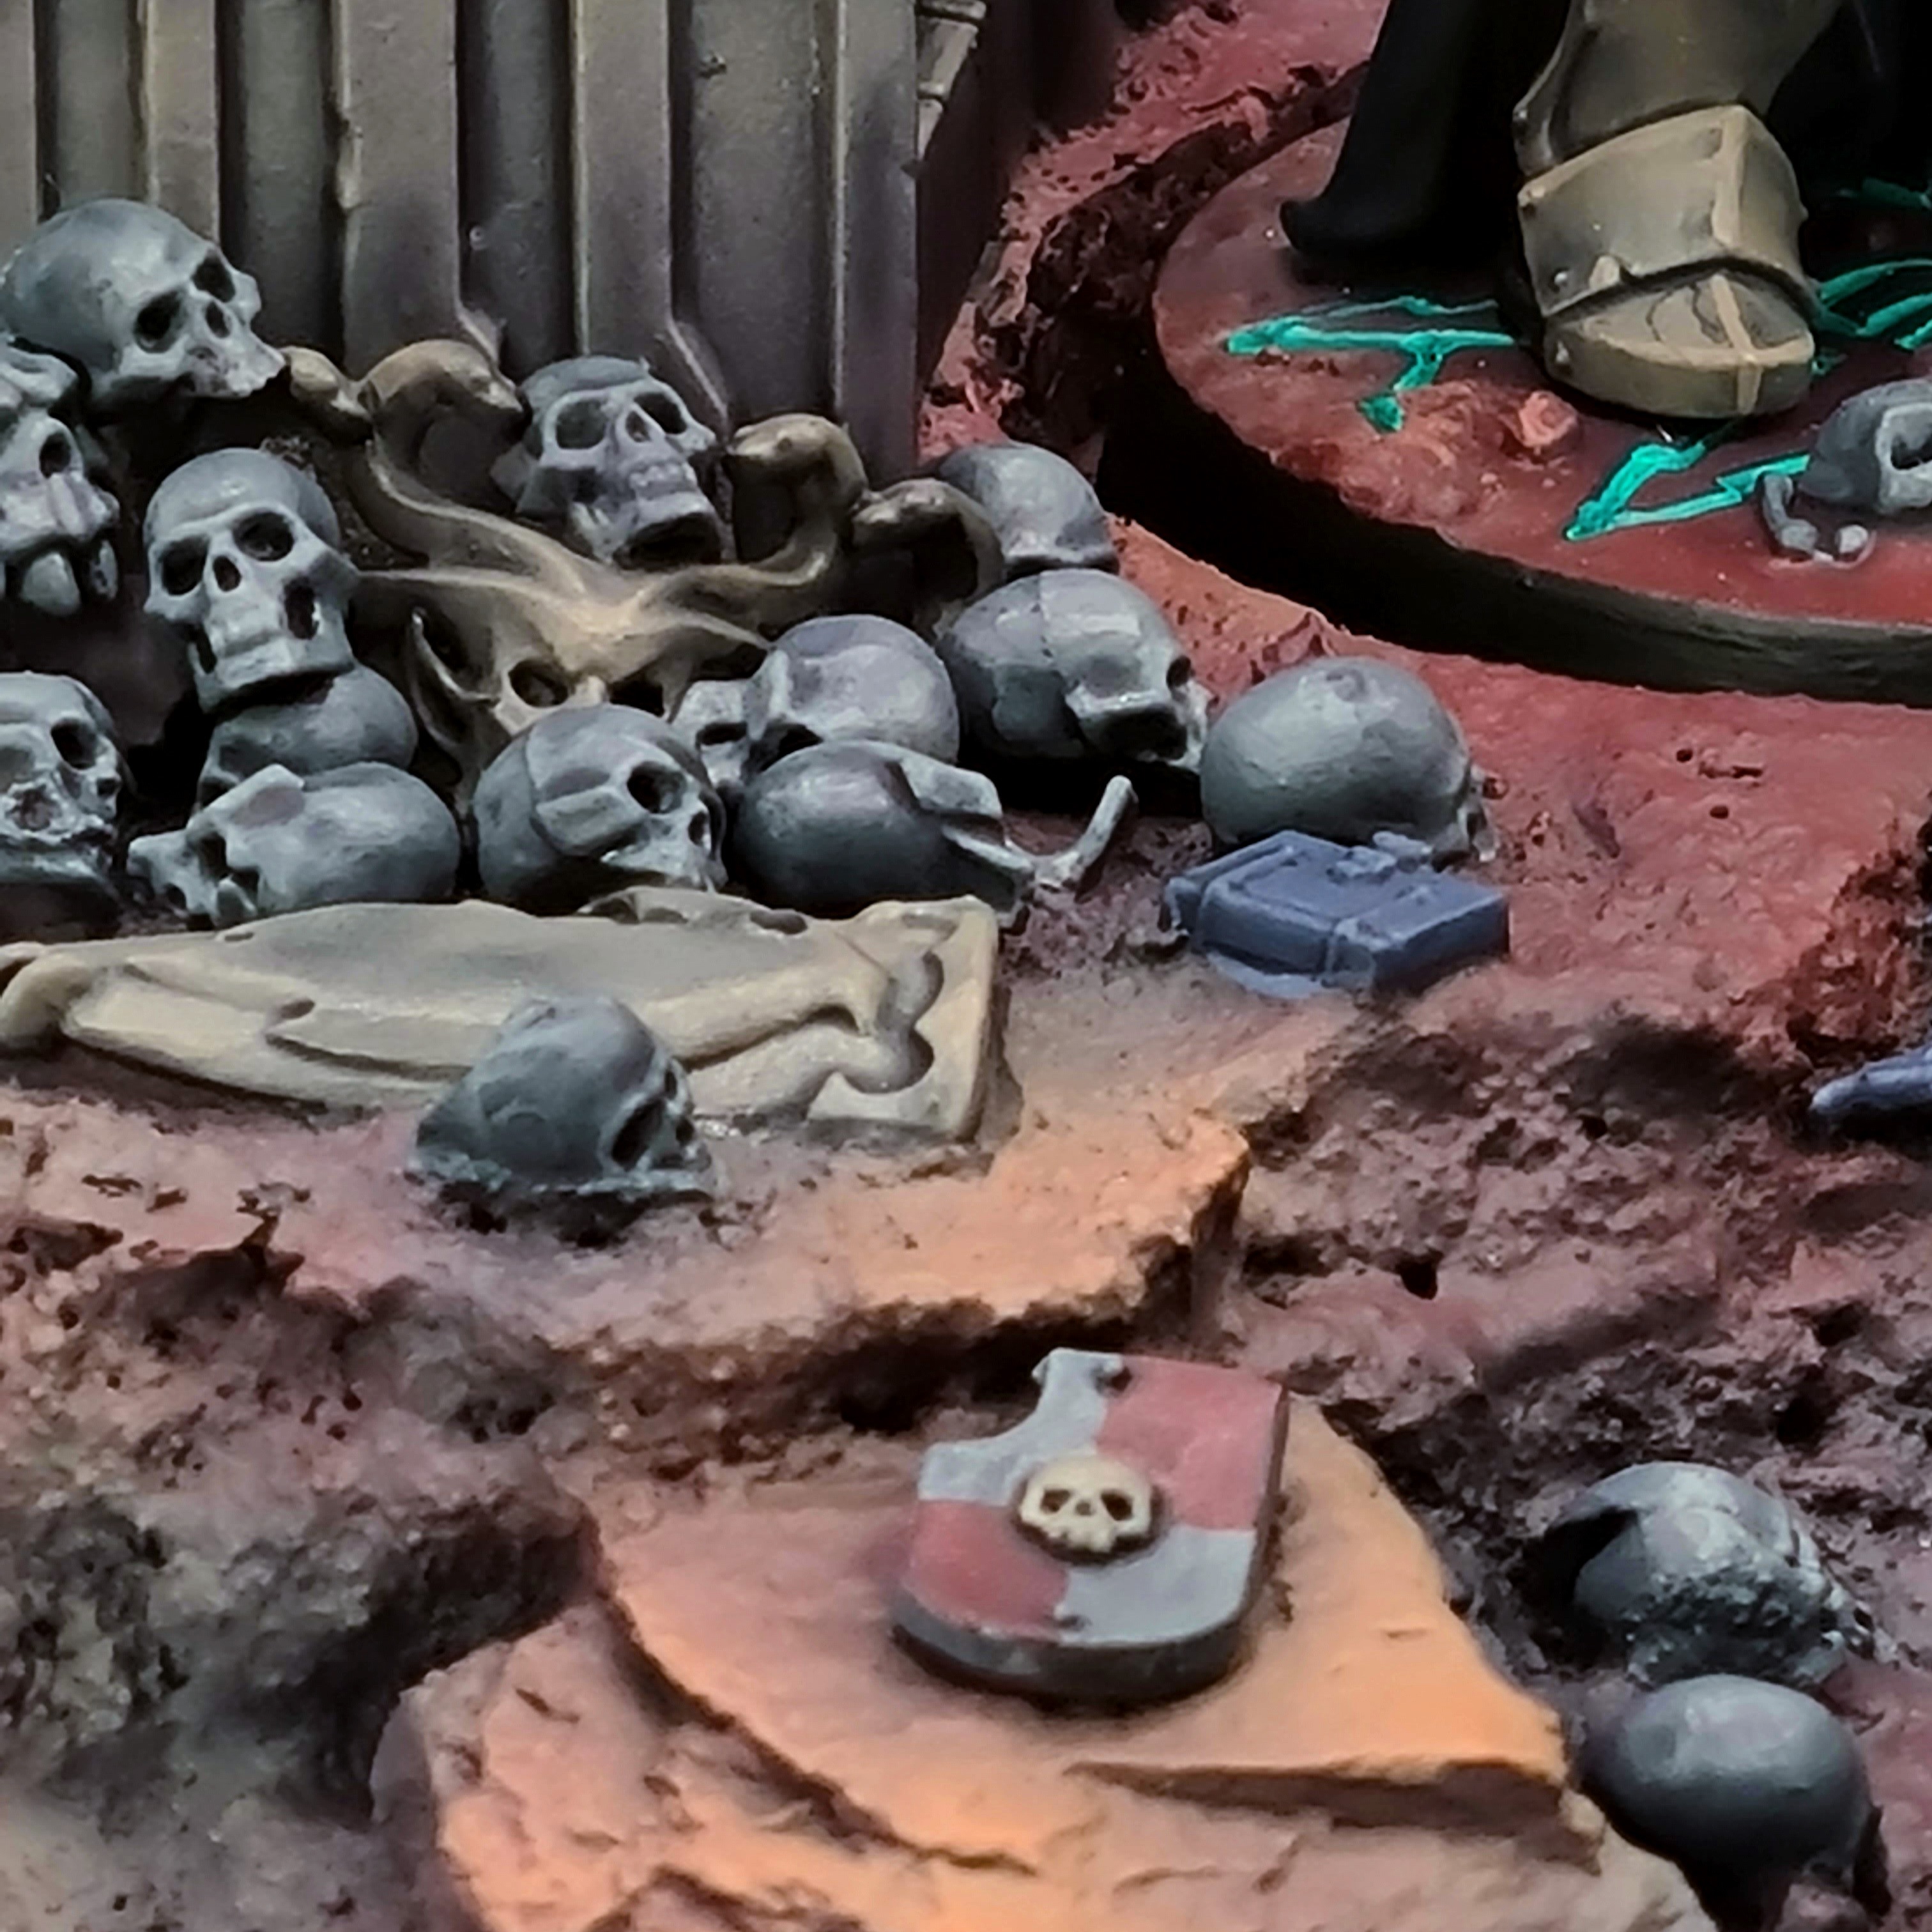
I wanted to tell a little bit of a story with my terrain, as though the warband had just captured an objective in the name of Khorne, as well as including a ‘lethal’ area at the front of the diorama, both of these are references back to the game of Warhammer Underworlds. This was also a great chance for me to use the old Nightvault terrain that I had sitting around.
Assembly
If, like me, you’re using cork sheets then you can start to build up layers to introduce some subtle elevation. (If you’re using something like foam, then you essentially do this step in reverse, cutting away instead of adding).
Before you glue the cork down you can also cut out circles from the cork for your bases to slot into. These will want to be very slightly bigger than the actual base so you don’t rub the paint off your base rims.

If you want to go a step further, you can magnetise your models and the base so the models snap into place. If you use more than one magnet per model, you can ensure the models are all pointing the correct way.
For my diorama, the first layer of cork was thinner than the others, so there wasn’t enough room for magnets. A little creative thinking lead to the magnets for Herax being glued to the underside of the base.
A huge drawback of using cork as I have is that it can look really obviously like cork, so you’ll want to try and mask the ‘layers’. I used rocks and offcuts of cork to vary up the textures and shapes a little more.
I also added some smoother rocky shapes with greenstuff, to roughly match the bases of the models themselves. After all, the end goal is that this should match pretty seamlessly with the bases of your models.

Adding texture
Then I started adding some texture. I used texture paint for this, as I had a load available, but there are definitely cheaper options available, e.g. sand. I also sprinkled on a bunch of skulls, rocks, and any of the other details I wanted to include on the final base.

From here you can start to see what the final base will look like and make any adjustments.
On my diorama I decided there were a lot of bits which still looked a little like layers of cork, so I used more cork offcuts and texture paint to add further variation to the flatter areas and fill some of the gaps around the sharp edges.


Painting
The next few steps will vary depending on how you paint your model’s base. If your models are already painted like mine were, then you’ll want to match it as closely as possible. Otherwise it may be helpful to paint them all at the same time, especially if the models can be removed from their bases.


I found it easiest to get the initial colours down with a combination of airbrushing and drybrushing, but you can obviously do this with a large brush too. As this was a large area I made sure to include a little more variation than I would usually.
Then I just finished up all of the small details – painting up all of the skulls, terrain and other hidden details I’d included in the diorama.


This was a super fun exploration, and it would be really fun to try this out again in future with some different warbands.
if you give this ago, I’d love to see! If you’re on Instagram you can tag me directly at @ajb_minis or share it with the whole team via @handfulofdice.
Did you enjoy this article? You could always tip the author with a coffee (or something stronger). If you want to pick up a warband or supplies to try this yourself then check out Element Games. They have great deals on a wide range of Warhammer and accessories. Finally, make sure you’re following us on Instagram to stay up to date and get involved in our community!


Nice tutorial and walk through for the base. Yeah the Citadel texture stuff is crazy expensive. Have you tried Vallejo mud ? It comes in huge jars and looks just as good (you can paint it too). The stuff dries solid and is really durable.
Thanks! I haven’t tried Vallejo mud, but might look into it next time my hobby supplies need topping up.